A WiFi Range Extender is a simple and effective way to make a WiFi network stretch further and cover more areas. Setting up a Netgear WiFi extender is very simple and doesn’t require a lot of technical know-how. Among the Netgear extenders are the EX8000 AC3000, EX7500 AC2200, EX7000 AC1900, EX6250 AC1750, N300, EX6110 AC1200, and WN2500RP N600. Many people can’t connect to the internet at home or work because there are large areas that aren’t connected. Dead zones are places where users can’t connect to WiFi or can only connect slowly. The best way to turn these dead zones into fun zones is to set up a Netgear WiFi Range Extender.
Continue reading this step-by-step guide to learn how to set up your Netgear WiFi Range Extender by hand.
The Netgear range extender is ready to use right away. Along with it, there is a Netgear repeater Manual that walks you through setting up the Netgear WiFi repeater. In this guide, you know how to set up a Netgear extender by following these steps. If you have any questions about how to set up a Netgear extender, you can also contact Geek Squad Assists at any time.
Netgear Router Range Extender: Setup Basics for Better WiFi Coverage.
The setup and setting of a Netgear range extender are very simple. Still, you need to make sure you have these things before you start the Netgear Extender Setup:
- The location of the extension should be near to Wi-Fi router
- A stable power source is needed for the WiFi range extender.
- A computer browser comes next. It is recommended that you put more than two web apps on your laptop or computer. The usual Netgear Extender Login page might not be accessible because of a problem with your web browser. If this happens, you can choose a different browser (chrome, Mozilla, firefox)
Netgear Extender Setup Using Wireless Protected Setup
The Wireless Protected Setup (WPS) method makes setting up your Netgear Extender easy and handy. To quickly set up and use your extender, follow simple steps:
1- Power On the Extender
Plug in your Netgear Extender and ensure it’s within range of your existing Wi-Fi network.
2- Plug the extender into a power source.
You need to plug the extender into a power.
If the Power LED does not light, press the power On/Off button.
3- Switch on the WPS button on the extender
- Press the WPS button on your extender.
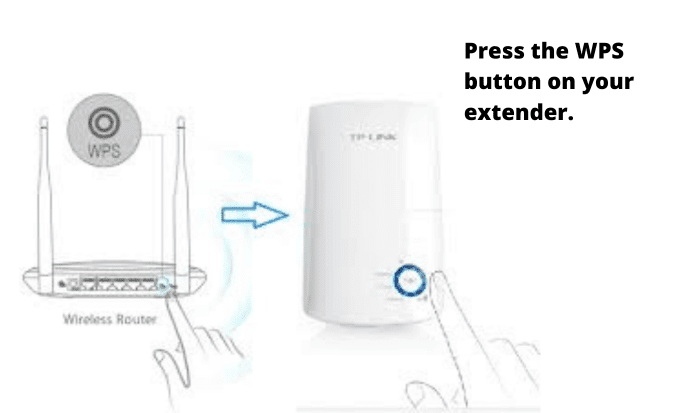
- The WPS LED blinks.
- Within two minutes, press the WPS button on your router.
- The extender WPS LED lights and stays solid (green color).
4- Take the extender off the wall and move it to a new spot about halfway between your router and the spot where the WiFi signal is weak.
5- Check Extender lights
After turning on the extender, check the lights. A light that looks like a router or “2GHz” and/or “5GHz” lights will show up, depending on the type of extender. One or more of the lights must be green or yellow for the extender to be able to speak to the router. When the light is red, move the extender closer to the router until it stops being red.
6- Connect Your Device
The extender applies your settings. This can take a few minutes.
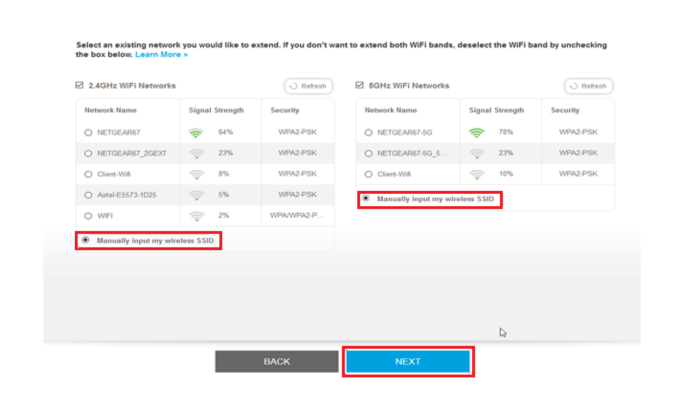
The extender displays the WiFi network name (SSID) and password for each of your extender’s bands. Take note of these.
You need to go to the WiFi settings on the device you want to connect to the extender’s new network and connect to it.
Back in your web browser, check the box at the bottom of the page, and then click or tap Next.
Your extender is now making your network’s range bigger.
Netgear Range Extender Setup Using Manual Method
If you want to set up your Netgear extender manually, follow these simple steps:
- Plug in your WiFi range extender into power.
- On your PC or mobile, open a web browser.
- Go to the page for setting up your Netgear range extender.
- The login window will show up.
- Type in both the username and the password.
- Press “Login” when you’re done.
- The Netgear Installation Assistant now appears on the screen.
- Follow the steps shown on the screen by the Netgear WiFi booster setup guide.
Wrapping Up!
The Wireless Protected Setup (WPS) method is a simple way to set up your Netgear WiFi booster and make your Wi-Fi range better. If you follow the steps above, you can quickly and safely connect your extender to your router. This will make sure that your network extender works well.
Once the setup is done, you’ll have a better internet connection all over your home or office, with no more dead spots and better internet performance on all your devices. With the easy-to-use WPS setup process, you can make your Wi-Fi network work better without having to deal with complicated settings. With your Netgear WiFi extension, you can say goodbye to connection problems and hello to the wider Wi-Fi range.